Similar to the development for any other platform, Salesforce development largely depends on the tool you are using. That is why, when a IDE does not match your requirements by lacking some functionality or offering utterly inconvenient ways to handle tasks, it is time to search for something different. Due to the popularity of Salesforce, and the enthusiasm of its contributors, there are several alternative options when it comes to finding a comfortable IDE.
However, in spite of the variety of such programs, many of the existing IDEs provide nothing more than basic functionality, which does not cover complex tasks within Salesforce. While in some cases this functionality can be enhanced by installing a few extensions and adding some extra applications, switching between them is not always comfortable. At the same time, many IDEs offer limited features, and even though they may be polished, you still have to use other IDEs to get the unsupported yet necessary functionality.
Here’s where The Welkin Suite tool comes in handy. Although this IDE was released not long ago, it already has a bunch of features that make your life as a developer a whole lot easier. Some of its functionality is not supported by other IDEs, such as Debug Logs Highlighting, Customizable Folder Structure, ApexDoc, Code Snippets, etc.
Here’s a brief overview of the key features that make The Welkin Suite stand out:
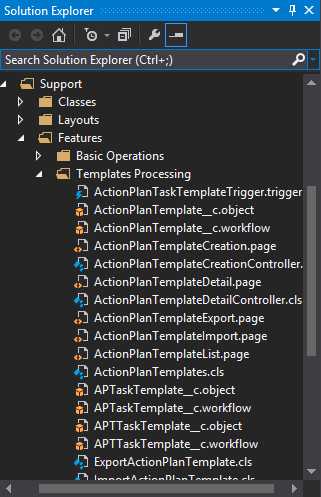
- Customizable Folder Structure
When working with your Salesforce project, you are mostly bound to use the default “Classes-Triggers-Components-Pages” structure, and you are not allowed to move any files between the folders. In TWS this limitation is removed, so you can organize your source code in the most convenient and logical way. You can simply drag the necessary file to any folder regardless of its type and nesting level. This way, pages can be grouped with controllers, utility classes and components, and you will always know exactly what each file does and to which file it relates. Besides, you will not waste your time switching between closely related components, since they will all be in one place. Also, having made all these changes, you can sync them with the Salesforce org to make them accessible from other PCs.
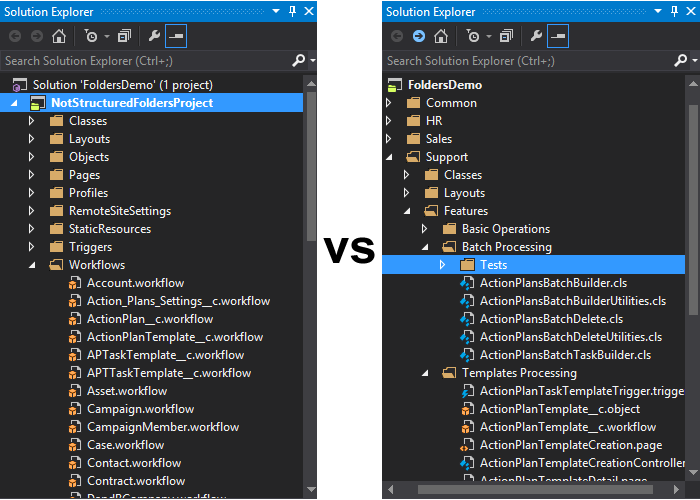
Although seemingly small in terms of the overall potential of The Welkin Suite, in reality the possibility to customize project structure introduces a series of benefits for the users. First off, this feature allows you to separate unrelated project parts, which reduces the time needed to find application-specific components and makes the position of the file within the project visible and recognizable. This significantly improves code navigation and makes working with large projects more convenient.
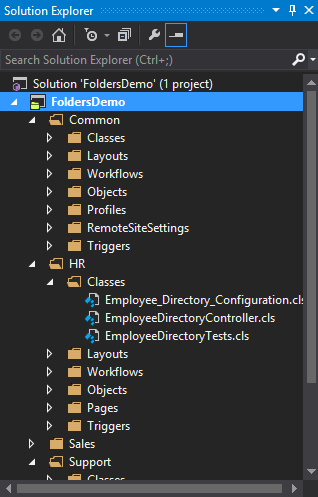
Also, since you are free to move feature-related components to one place, the project structure as such becomes self-descriptive, meaning that you no longer need additional documentation. This is where Single Responsibility Principle in development comes to life.
Finally, you can group all your tests to a separate project branch, which will immediately increase the visibility of the actual ‘useful’ code in your project structure, and allow you to get rid the ‘Test’ prefix if necessary.
2) Advanced Editor
When it comes to development, time really matters, and The Welkin Suite did a good job introducing plenty of time-saving features, such as an advanced code editor, which really speeds up the development by a series of shortcuts. In fact, this IDE has several built-in editors for Apex, Visualforce, HTML, CSS and Javascript, each packed with the functionality to take the weight of small tasks off your shoulders.
This includes code completion, which not only allows you to save time when coding by providing a list of suggestions, but also helps you make fewer mistakes.
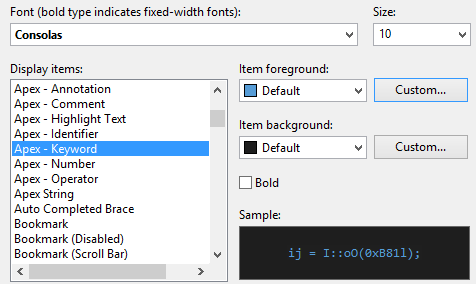
Likewise, all of the editors support customizable syntax highlighting, which will highlight parts of your code in different colors depending on the lexical type.
Apart from that, this IDE’s Apex Editor also has a parser, which improves your coding velocity a whole lot.
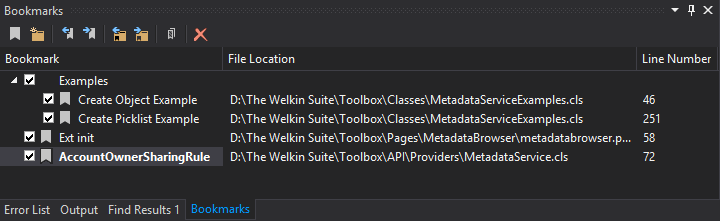
Finally, The Welkin Suite team put a lot of effort into ensuring convenient navigation. For instance, you can bookmark some parts of your code, which allows you to navigate there in a few clicks instead of having to scroll to the necessary spot.
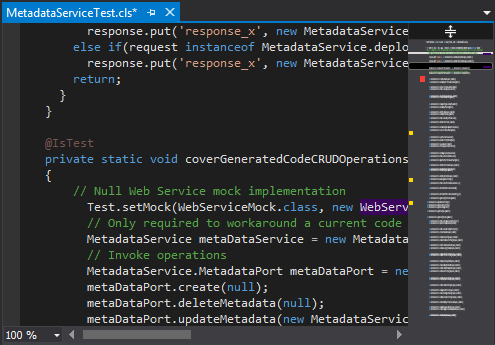
What is also cool is that this IDE has a very convenient code-map scrollbar, which gives you a preview of your code when you move your mouse over the scrollbar. This works best if you have large code base and you don’t want to waste your time searching for the place where you left off. Apart from that, errors, search results, and highlighted text are shown in the scrollbar as well, which makes this tool even more user-friendly.
3) Lightning components and applications support
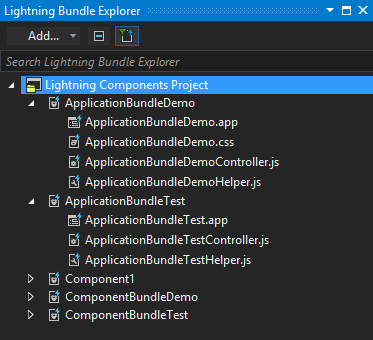
Lately, Salesforce has been all about Lightning as a new and progressive application technology, so naturally, when developing in Salesforce you would look for a tool that supports the latest trends. What is cool about The Welkin Suite is that it allows you to develop Lightning applications and components directly in the IDE, using the Lightning Bundle Explorer, and then preview the results in the handy Lightning Previewer.
4) Convenient Pull and Merge functionality
Since Salesforce is a cloud-based environment, there are cases where several developers are working on the same project at the same time. This means that the changes they make to the code may conflict with each other. The Welkin Suite provides a convenient way to solve such conflicts.
First, this IDE allows you to pull changes from your Salesforce org to see if anything has been changed and update your project in accordance with these changes.
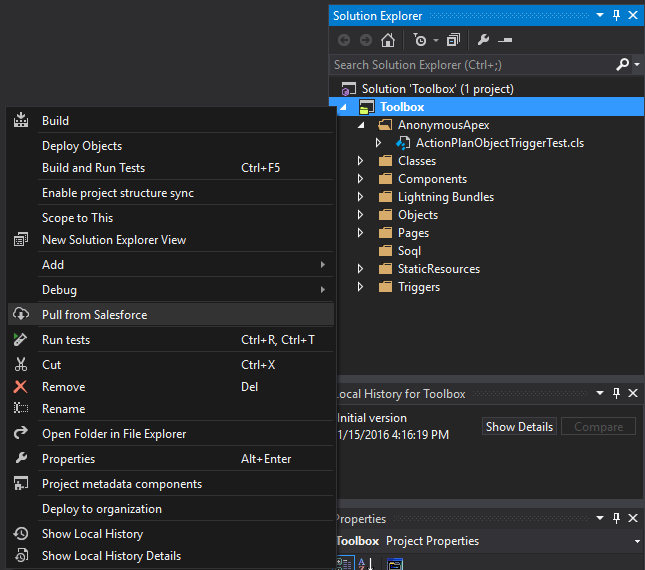
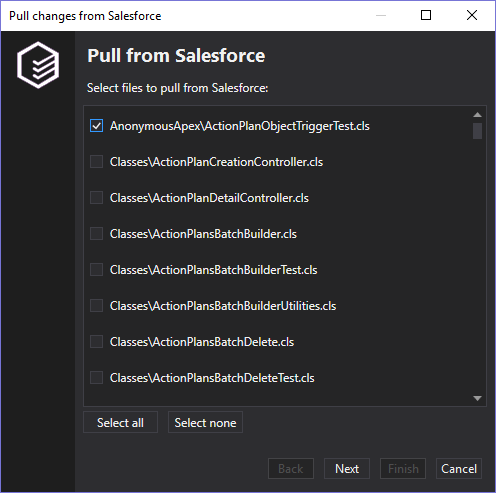
While you can pull the whole project, this IDE also allows you to pull separate files. This shortens the pull process significantly and saves your time. You can simply check the files you need in a separate window and it will take a few seconds to have them updated.
In case a conflict was detected in some file, you will be offered to override the changes you made to this file locally:
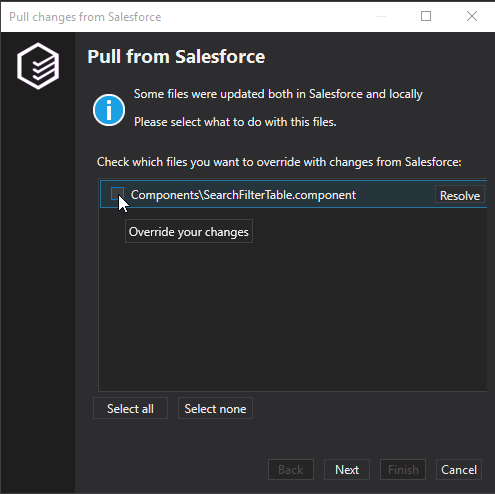
Alternately, you will be offered to merge your local changes with those made on the server. Although to do that you need to install an external tool, when installing The Welkin Suite you will be offered to install the KDiff3 merge tool or you can use some other merge tool that is supported by the IDE.
5) Quick and effective Unit Testing and Code Coverage
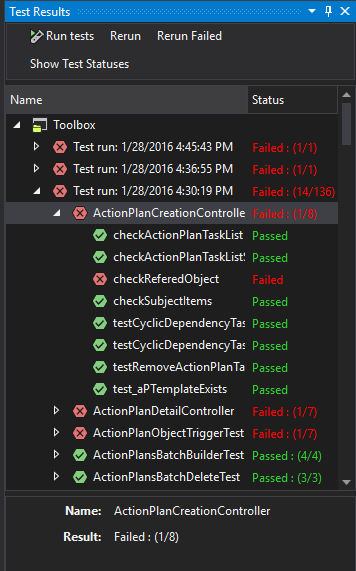
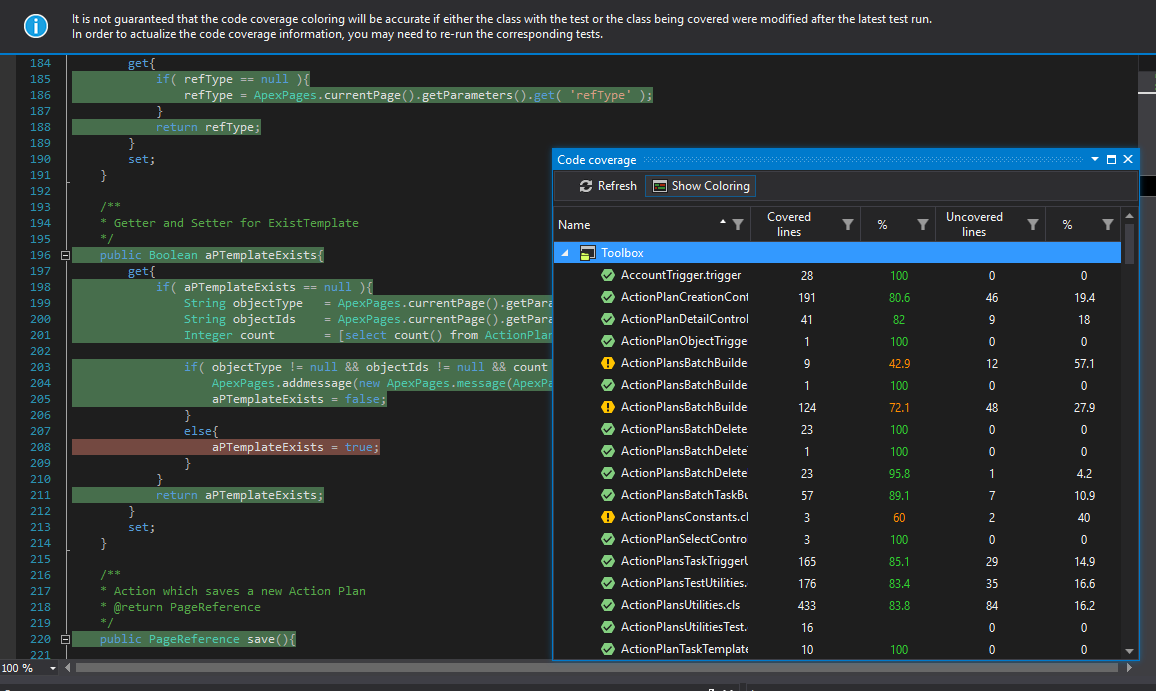
Since Salesforce states that no less than 75% of the code should be covered by tests, the efficiency and ergonomics of the Test Runner functionality is crucial for the development process. Here’s where The Welkin Suite made things simple by offering a Test Runner process that works in the background in a separate panel, so that it will not interfere with your workflow. Plus, this panel provides all the necessary information on the tests, both in progress and finished, along with their statuses. In case any error message is given, it will be displayed on this panel as well, along with the log info - the results of the test run, stack trace and message. The Welkin Suite also allows you to open the log directly from this panel.
What is also cool is that you can choose to rerun failed tests directly from this panel, which is handy because you immediately see exactly which tests have failed and then you can open the corresponding file from this very panel without searching for it throughout your project.
You can also choose an option to build and run tests, which saves tons of time when you are working with tests a lot.
To see which portion of your code is covered by tests, you can use the Code Coverage option, which shows the list of files in your project in a separate window, and provides the percentage along with the number of covered and uncovered lines.
6) Local Changes History
Working without keeping track of your progress is almost impossible, so when coding, you should always have some backup. Most commonly, in Salesforce development you have to manually copy the files and store them somewhere else, but The Welkin Suite’s version control system provides a more convenient way. At times when something is going wrong, you have a quick way to track the changes, compare the versions of the same file, or even restore to any previous version.
With this process fully automated and a very user-friendly interface, this feature really improves the development process by reducing the number of actions you need to make.

All in all, these features really bring The Welkin Suite IDE to the top. While there is a lot done already, the team has not stop and has other features planned, namely, the Mac version.
Give this IDE a try and share your feedback with the creators - your feedback will not go unnoticed!
You can download this IDE here - https://welkinsuite.com/
https://www.linkedin.com/company/the-welkin-suite


